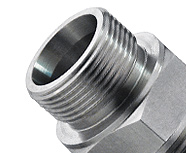
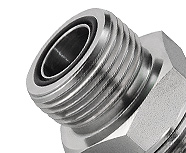
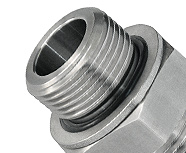
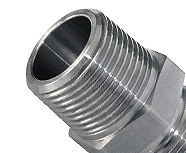
Terms & Definitions
Metric Fittings vs. Metric Threads
The terminology used to describe the majority of foreign threaded fittings can be confusing to some. Metric fitting is a loose term describing fitting bodies with foreign threads including BSP, DIN, JIS, Kobelco, Komatsu, and Metric, even though some of these are based in imperial or “inch” dimensions. Metric threads, however, refers to a specific type of foreign thread.

Part Numbering and Hose/Tube Side vs. Port Side
When fittings are classified or part-numbers displayed, the first group of numbers indicates the part series or group, while the dash sizes indicate the thread sizes. The sizes are usually displayed tube or hose side first, meaning that the end connecting to a hose or tube is typically listed as the first dash size. The port side is usually listed as the second dash size.

Thread Form vs. Thread Pitch vs Threads per Inch
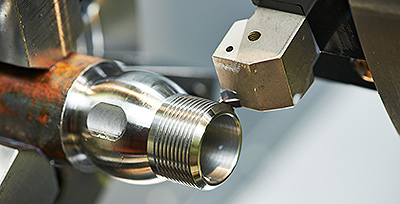
When identifying fittings, another important factor to look at is thread form and thread pitch, or threads per inch in other cases. Thread form refers to the angle (in degrees) that exists between adjacent flanks of a thread. This is a difficult method of identification and requires a profile projector to be certain. Thread pitch however, refers to the distance measured between adjacent thread crests, and is typically used when measuring Metric threads.
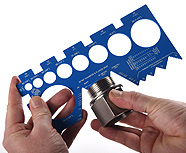
On the other hand, threads per inch or “TPI” is often used, which counts the number of threads over one inch of distance. In some cases, calculations are required i.e. 5.5 threads counted over a ½” would mean there are 11 threads over 1”. It is recommended to use a thread gauge as it provides the most accurate form of identification.

| Thread Type | Thread Flank Angle | TPI vs mm Pitch |
|---|---|---|
| BSPP | 55° | TPI |
| BSPT | 55° | TPI |
| JIC | 60° | TPI |
| JIS | 55° | TPI |
| KOBELCO | 60° | mm Pitch |
| KOMATSU | 60° | mm Pitch |
| METRIC 60° | 60° | mm Pitch |
| METRIC DIN TUBE | 60° | mm Pitch |
| NPT | 60° | TPI |
| ORB | 60° | TPI |
| ORFS | 60° | TPI |

Major vs Minor Thread Diameter
All threads have what’s known as a Major Diameter, and a Minor Diameter. Major Diameter is the measurement from thread crest to thread crest, while Minor Diameter is measured from thread root to thread root. With male threads, the Major Diameter (our outer diameter, O.D for short) of the thread could be measured and compared to a chart of various thread types and known Major Diameters/O.D’s for identification purposes. For female threads, instead compare the Minor Diameter (also known as internal diameter, or I.D for short). You can compare your caliper readings to published specifications in order to find the closest match.
| Inch Fraction | Dash Size |
|---|---|
| 1/8” | 02 |
| 3/16” | 03 |
| 1/4” | 04 |
| 5/16” | 05 |
| 3/8” | 06 |
| 7/16” | 07 |
| 1/2" | 08 |
| 5/8” | 10 |
| 3/4” | 12 |
| 7/8” | 14 |
| 1” | 16 |
| 1-1/4” | 20 |
| 1-1/2” | 24 |
| 2” | 32 |
| 2-1/2” | 40 |
| 3” | 48 |
Nominal Size vs Dash Size
The ‘nominal size’ is an engineering term for a non-specific reference or trade size of a part (such as a pipe) that is for identification purposes only and may not match any exact dimension. For example, a 2” nominal pipe has neither a 2” I.D or O.D, but an O.D of 2.375” and an I.D range of 0.065” to 0.436” depending on the schedule. However, a 2” NPT thread would be applicable to all of these because of the common nominal sizing based on approximate outer diameter.
The nominal area of reference depends on the fitting or thread type; this could be based on the thread O.D, thread O.D & pitch (callout), hose/tube/pipe I.D or O.D, and/or tube class. The nominal size is in either inches or mm (millimeters), and the methodology of which usually remains consistent from one vendor to the next. Here are some examples:
| Thread Type | Nominal Size Based On | Nominal Size Example |
|---|---|---|
| BSPP | Hose/tube/pipe I.D (inches) | 1/4”, 3/8”, 1/2” etc |
| BSPT | Hose/tube/pipe I.D (inches) | 1/4”, 3/8”, 1/2” etc |
| DIN Metric | Pressure class (LL, L, or S) & tube O.D in mm (sometimes thread size &/or pitch included) | L08, L08 14mm, L08-14X1.5, etc. (mm) |
| JIC | Hose/tube I.D (inches) | 1/4”, 3/8”, 1/2” etc |
| JIS | Hose/tube I.D (inches) | 1/4”, 3/8”, 1/2” etc |
| Kobelco | Tube O.D & thread O.D (pressure class always L and is pitch always 1.5) | 22-30 (22mm tube, 30x1.5 thread) |
| Komatsu | Thread O.D (mm) - always a 1.5 pitch | 14mm |
| Metric | Thread O.D (mm) – sometimes thread pitch is included especially if non-standard | 14mm, 14X1.5, 14X1.0, etc |
| NPT | Pipe O.D (inches) | 1/4”, 3/8”, 1/2” etc |
| ORB | Hose/tube I.D (inches) | 1/4”, 3/8”, 1/2” etc |
| Metric Thread (O.D) | Standard Thread Pitch (mm) |
|---|---|
| 6mm | 1.0 |
| 8mm | 1.0 |
| 10mm | 1.0 |
| 12mm | 1.5 |
| 14mm | 1.5 |
| 16mm | 1.5 |
| 18mm | 1.5 |
| 20mm | 1.5 |
| 22mm | 1.5 |
| 24mm | 1.5 |
| 26mm | 1.5 |
| 27mm | 2.0 |
| 30mm | 2.0 |
| 33mm | 2.0 |
| 36mm | 2.0 |
| 42mm | 2.0 |
| 45mm | 2.0 |
| 42mm | 2.0 |
Once the nominal size of the thread is be determined, the nominal size needs to be converted to a ‘dash size’ for ordering. A dash size is simply a 2-digit reference for sizing a hose, tube, pipe or fitting, and is displayed as a fraction of 16. Each size increments by 1/16” if the nominal sizing is based on inches, then drop the /16. For example, 1/2” converts to 8/16” which is the same as a -08 (dash zero eight).
However, if the nominal size is metric (mm) based, then no calculation is required - simply drop the mm. For example, a 30mm thread has a dash of -30 (dash thirty). If the thread pitch is nonstandard for that Metric thread, then the thread pitch is sometimes displayed in the dash size i.e. 30x1.5 (standard thread pitch for 30mm is 2.0).

